-
간단한 게시판 만들기JAVA/웹 프로그래밍 - JSP 2020. 11. 9. 22:34
우선, MultiInsert.jsp 파일부터 만드는데, MultiInsert이 하는 역할은
테이블에 데이터를 충분히 많이 저장하기 위해 만든 것이다.
반복문을 돌면서 데이터를 테이블에 저장하는 것을 아래에서 볼 수 있다.
MultiInsert.jsp
더보기<%@ page language="java" contentType="text/html; charset=UTF-8" pageEncoding="UTF-8"%> <%@ page import="java.io.*"%> <!-- 임포트 필요 --> <%@ page import="java.sql.*"%> <!-- Connection 클래스를 쓰려면 임포트 필요 --> <!DOCTYPE html> <html> <head> <meta charset="UTF-8"> <title>Insert title here</title> </head> <body> <% try { // 오라클에 접속하기 위해서는 드라이버를 로드해야 한다. Class.forName("oracle.jdbc.driver.OracleDriver"); Connection conn = DriverManager.getConnection( "jdbc:oracle:thin:@localhost:1521:xe", "HR", "1234"); if (conn == null) {System.out.println("DB접속에 실패");} else {System.out.println("DB접속 성공");} PreparedStatement pstmt = null; for (int i = 0; i < 20; i++) { /* String sql = "insert into message(no,name,content) values("; sql += i+9; sql += ",'hong','hongmessage')"; */ String sql = "insert into message(no,name,content) values("+(i+9)+",'hong','hongmessage')"; pstmt = conn.prepareStatement(sql); int result = pstmt.executeUpdate(); } pstmt.close(); conn.close(); response.sendRedirect("list.jsp"); } catch(Exception e){} finally{} %> </body> </html>아래의 boardpage,jsp는 아주 간단한 게신판의 예이다.
전체 페이지의 개수를 아래와 같은 조건이 붙은 이유는
만약 한 페이지 당 보여줄 글의 개수를 10개라고 하고 총 글의 개수를 28개라고 한다면
총 3페이지가 필요하다.
즉, 3페이지 째에 8개의 글이 들어있어야 하기 때문이다.
만약 글의 개수가 20개라고 하면, 딱 2페이지만 있으면 된다.

boardpage.jsp
더보기<%@ page language="java" contentType="text/html; charset=UTF-8" pageEncoding="UTF-8"%> <!DOCTYPE html> <html> <head> <meta charset="UTF-8"> </head> <body> <% int totalCount=21; // 전체 글의 갯수 int countPerPage=10; // 페이지당 글의 갯수 //int totalPageCount=(totalCount/countPerPage)+1; int totalPageCount; // 전체 페이지 수 if(totalCount % 10 == 0) totalPageCount=(totalCount / countPerPage); else totalPageCount=(totalCount / countPerPage) + 1; %> <div> <h2>게시판 리스트</h2> <p>게시판 페이지 연습</p> <ul> <li><a href="#">이전페이지</a></li> <% for (int i = 1; i <= totalPageCount; i++){ %> <li><a href="#"><%=i%></a></li> <% } %> <li><a href="#">다음페이지</a></li> </ul> </div> </body> </html>boardpage.jsp
더보기<%@ page language="java" contentType="text/html; charset=UTF-8" pageEncoding="UTF-8"%> <!DOCTYPE html> <html> <head> <meta charset="UTF-8"> </head> <body> <% int totalCount = 156; // 전체 글의 갯수 int countPerPage = 10; // 페이지당 글의 갯수 int totalPageCount; // 전체 페이지 수 if(totalCount % 10 == 0) totalPageCount = (totalCount / countPerPage); else totalPageCount=(totalCount / countPerPage) + 1; // 리스트 중 요구하는 글번호를 클릭했을 경우 int requestNumber = 70; // 해당페이지의 해당페이지 번호,시작글번호, 끝 글번호 // 요청한 글에 대한 페이지 구하기 /* int startPage; if(requestNumber%10==0){ startPage=(requestNumber/countPerPage); }else{ startPage=(requestNumber/countPerPage)+1; } */ int startPage = 1; // 페이지의 초기값으로 첫 번째 페이지로 설정 String _startPage = request.getParameter("requestPage"); if (_startPage != null) startPage = Integer.parseInt(_startPage); if (startPage < 1) startPage = 1; int endPage; // 숫자4의 의미는 보여줄 페이지의 간격으로 startPage가 1이면 // 1에서 5까지를 보여주겠다는 의미이다. // 만약,totalPageCount가 3이라면, 1~5페이지까지 보여줄 필요가 없다. // 즉, 마지막 페이지인 1~3까지만 보여주면 된다. if ((startPage + 4) > totalPageCount) endPage = totalPageCount; else endPage = startPage + 4; if(endPage > totalPageCount) endPage = totalPageCount; // 요청한 글번호에 대해 시작글번호 끝 글번호 구하기 // 화면에 나타날 시작 글번호, 끝 글번호 구하기 // firstRow와 endRow는 requestPage의 첫 번째 글과 마지막 글 번호이다. int requestPage = 7; // 만약 요청한 페이지가 1이고 글의 갯수가 0개 int firstRow = (requestPage - 1) * countPerPage + 1; // 61번 첫번째 글 if(firstRow < 1) firstRow = 0; int endRow = firstRow + countPerPage - 1; if(endRow > totalCount) endRow = totalCount; %> <div> <h2>게시판 리스트</h2> <p>게시판 페이지 연습</p> <ul> <li><a href="boardpage.jsp?requestPage=<%=startPage-1%>">이전페이지</a></li> <% for(int i=startPage;i<=endPage;i++){ %> <li><a href="#"><%=i%></a></li> <% } %> <li><a href="boardpage.jsp?requestPage=<%=startPage+1%>">다음페이지</a></li> </ul> </div> </body> </html>그러기에 앞서 우선, 테이블에서 기존에 우리는 No를 직접 입력하는 방식을 사용하였다.
시퀸스를 추가를 해보자.

위에서 이클리스 상단에서 Database development를 선택한다.
그리고 Data Source Explorer 탭을 선택하면 아래의 그림과 같이 나온다.

HR-oracle을 선택하고 우클릭해서 connect를 한다,
그리고 다시 우클릭해서 Open SQL scrapbook을 선택한다.
DB에 맞게 선택을 한다.
우선 message 테이블에서 데이터를 먼저 제거해보자.
delete from MESSAGE;
그리고 아래의 문장을 실행한다.
create sequence message_seq_no increment by 1 start with 1; // 1부터 1씩 증가아래의 문장을 실행한다.
select message_seq_no.nextval from dual;
아래는 나머지 명령문들이다.
select message_seq_no.currval from dual; <- 이거 안 되는 것 같음
drop sequence message_seq_no;
alter sequence message_seq_no increment by 1;시퀸스가 추가가 되었으므로 이에 따라 수정할 파일들이 존재한다.
messageForm.jsp에서 번호를 입력하지 못하게 disable하자.
messageForm.jsp
더보기<%@ page language="java" contentType="text/html; charset=UTF-8" pageEncoding="UTF-8"%> <!DOCTYPE html> <html> <head> <meta charset="UTF-8"> <meta name="viewport" content="width=device-width, initial-scale=1"> <link rel="stylesheet" href="https://maxcdn.bootstrapcdn.com/bootstrap/3.4.1/css/bootstrap.min.css"> <script src="https://ajax.googleapis.com/ajax/libs/jquery/3.5.1/jquery.min.js"></script> <script src="https://maxcdn.bootstrapcdn.com/bootstrap/3.4.1/js/bootstrap.min.js"></script> <title>Insert title here</title> </head> <body> <div class="container"> <h2><a href="index.jsp"> Main menu로 이동</a></h2> <h2>메시지 입력</h2> <form action=messageForm_proc.jsp method=post> <div class="form-group"> <label for="no">번호:</label> <input disabled type="text" class="form-control" id="no" name="no" placeholder="번호를 입력하세요"> </div> <div class="form-group"> <label for="name">이름:</label> <input type="text" class="form-control" id="name" name="name" placeholder="이름을 입력하세요"> </div> <div class="form-group"> <label for="content">메모:</label> <input type="text" class="form-control" id="content" name="content" placeholder="메모를 입력하세요"> </div> <button type="submit" class="btn btn-default">입력</button> </form> </div> </body> </html>그리고, messageForm_proc,jsp에서는 messageForm넘겨받은 데이터를 DB에 저장을 하였는데
여기서 번호는 시퀸스로 만들었으므로 번호를 넣어줄 필요가 없다.
SQL의 select 구문에 수정이 필요하다.
messageForm_proc,jsp
더보기<%@ page language="java" contentType="text/html; charset=UTF-8" pageEncoding="UTF-8"%> <%@ page import="java.io.*" %> <%@ page import="java.sql.*" %> <!DOCTYPE html> <html> <head> <meta charset="UTF-8"> <title>Insert title here</title> </head> <body> <% try{ //request.setCharacterEncoding("utf-8"); //int no=Integer.parseInt(request.getParameter("no")); String name=request.getParameter("name"); String content=request.getParameter("content"); //System.out.printf("%d, %s, %s\n",no,name,content); Class.forName("oracle.jdbc.driver.OracleDriver"); Connection conn=DriverManager.getConnection( "jdbc:oracle:thin:@localhost:1521:xe","hr","1234"); //url,id,password if(conn==null) {System.out.println("DB접속에 실패");} System.out.println("DB접속 성공"); //sql문을 작성해서 conn객체를 이용하여 데이터 베이스에 데이터 가져오기 //String sql="insert into message(no,name,content) values(?,?,?)"; String sql="insert into message(no,name,content) values(message_seq_no.nextval,?,?)"; PreparedStatement pstmt=conn.prepareStatement(sql);//위의 sql문을 처리하기 위해 객체 생성 //?물음표를 채워줘야함. /* pstmt.setInt(1, no); pstmt.setString(2, name); pstmt.setString(3, content); */ pstmt.setString(1, name); pstmt.setString(2, content); int result=pstmt.executeUpdate(); System.out.println(result+"개가 입력되었습니다."); pstmt.close(); conn.close(); response.sendRedirect("list.jsp"); }catch(Exception e){} finally{} %> </body> </html>그리고 위의 MultiInsert,jsp에도 수정이 필요하다.
MultiInsert.jsp
더보기<%@ page language="java" contentType="text/html; charset=UTF-8" pageEncoding="UTF-8"%> <%@ page import="java.io.*"%> <!-- 임포트 필요 --> <%@ page import="java.sql.*"%> <!-- Connection 클래스를 쓰려면 임포트 필요 --> <!DOCTYPE html> <html> <head> <meta charset="UTF-8"> <title>Insert title here</title> </head> <body> <% try { // 오라클에 접속하기 위해서는 드라이버를 로드해야 한다. Class.forName("oracle.jdbc.driver.OracleDriver"); Connection conn = DriverManager.getConnection( "jdbc:oracle:thin:@localhost:1521:xe", "HR", "1234"); if (conn == null) {System.out.println("DB접속에 실패");} else {System.out.println("DB접속 성공");} PreparedStatement pstmt = null; for (int i = 0; i < 20; i++) { /* String sql = "insert into message(no,name,content) values("; sql += i+9; sql += ",'hong','hongmessage')"; */ //String sql = "insert into message(no,name,content) values("+(i+9)+",'hong','hongmessage')"; String sql = "insert into message(no,name,content) values(message_seq_no.nextval"; sql += ",'hong','hong message')"; pstmt = conn.prepareStatement(sql); int result = pstmt.executeUpdate(); } pstmt.close(); conn.close(); response.sendRedirect("list.jsp"); } catch(Exception e){} finally{} %> </body> </html>위의 MultiInsert.jsp를 실행해서 테이블에 데이터들을 저장해보자.
list.jsp에는 가장 많은 변경 내용이 있다.
테이블에 있는 내용들을 게시판 형식으로 출력을 하도록 구현이 되어있다.
그리고 전체 페이지 수를 구하기 위해서 try ~ catch문에서 하던 DB접속을 위쪽으로 옮겨와서 테이터의 개수를 구한다.
그리고 하단에 글쓰기(입력) 버튼을 하나 만들어서 입력받을 수 있도록 링크를 걸도록 한다.
그리고 리스트에서 이름을 클릭했을 시에 수정, 삭제 버튼을 만들어서 수정과 삭제의 기능을 하도록 링크를 걸도록 하자.
printSearch_proc.jsp에 수정이 필요하다.
삭제 시에는 deleteSearch_view가 아닌 delete_proc 으로 바로 링크를 걸어서 삭제를 하도록 하자.
printSearch_proc.jsp
더보기<%@ page language="java" contentType="text/html; charset=UTF-8" pageEncoding="UTF-8"%> <%@ page import="java.io.*" %> <%@ page import="java.sql.*" %> <!DOCTYPE html> <html> <head> <meta name="viewport" content="width=device-width, initial-scale=1"> <link rel="stylesheet" href="https://maxcdn.bootstrapcdn.com/bootstrap/3.4.1/css/bootstrap.min.css"> <script src="https://ajax.googleapis.com/ajax/libs/jquery/3.5.1/jquery.min.js"></script> <script src="https://maxcdn.bootstrapcdn.com/bootstrap/3.4.1/js/bootstrap.min.js"></script> <link rel="stylesheet" href="https://cdnjs.cloudflare.com/ajax/libs/font-awesome/4.7.0/css/font-awesome.min.css"> <meta charset="UTF-8"> <title>Message Print</title> </head> <body> <% try{ String name=request.getParameter("name"); System.out.println(name); Class.forName("oracle.jdbc.driver.OracleDriver"); Connection conn=DriverManager.getConnection( "jdbc:oracle:thin:@localhost:1521:xe","hr","1234"); if(conn==null) {System.out.println("DB접속에 실패");} System.out.println("DB접속 성공"); //sql문을 작성해서 conn객체를 이용하여 데이터 베이스에 데이터 가져오기 String sql="select * from message where name=?"; PreparedStatement pstmt=conn.prepareStatement(sql);//위의 sql문을 처리하기 위해 객체 생성 pstmt.setString(1, name); ResultSet rs=pstmt.executeQuery(); if(rs.next()) { %> <div class="container"> <h2><button class="btn" onclick="location.href='index.jsp'"><i class="fa fa-home"></i></button>검색 결과</h2> <div class="form-group"> <label for="no">번호:</label> <input value=<%=rs.getInt("no")%> disabled type="text" class="form-control" id="no" name="no" > </div> <div class="form-group"> <label for="name">이름:</label> <input value=<%=rs.getString("name")%> disabled type="text" class="form-control" id="name" name="name"> </div> <div class="form-group"> <label for="content">메모:</label> <input value=<%=rs.getString("content")%> disabled type="text" class="form-control" id="content" name="content"> </div> <div class="form-group"> <button onclick="location.href='updateSearch_view.jsp?no=<%=rs.getInt("no")%>'">글수정</button> <button onclick="location.href='delete_proc.jsp?no=<%=rs.getInt("no")%>'">글삭제</button> </div> </div> <%}else{%> <script> alert("검색한 결과가 없습니다."); window.location.href = 'http://localhost:9090/message/printSearch.jsp'; </script> <% //response.sendRedirect("print_search.jsp"); } pstmt.close(); conn.close(); }catch(Exception e){} finally{} %> </table> </body> </html>updateSearch_view에도 수정이 필요하다. 번호를 조건으로 검색을 하도록 한다.
updateSearch_view.jsp
더보기<%@ page language="java" contentType="text/html; charset=UTF-8" pageEncoding="UTF-8"%> <!-- 아래의 내용을 임포트 하자 --> <%@ page import="java.io.*" %> <%@ page import="java.sql.*" %> <!DOCTYPE html> <html> <head> <meta name="viewport" content="width=device-width, initial-scale=1"> <link rel="stylesheet" href="https://maxcdn.bootstrapcdn.com/bootstrap/3.4.1/css/bootstrap.min.css"> <script src="https://ajax.googleapis.com/ajax/libs/jquery/3.5.1/jquery.min.js"></script> <script src="https://maxcdn.bootstrapcdn.com/bootstrap/3.4.1/js/bootstrap.min.js"></script> <meta charset="UTF-8"> <title>Message Update</title> </head> <body> <% try{ int no = Integer.parseInt(request.getParameter("no")); //String name=request.getParameter("name"); //System.out.println(name); Class.forName("oracle.jdbc.driver.OracleDriver"); Connection conn=DriverManager.getConnection( "jdbc:oracle:thin:@localhost:1521:xe","hr","1234"); if(conn==null) {System.out.println("DB접속에 실패");} System.out.println("DB접속 성공"); //sql문을 작성해서 conn객체를 이용하여 데이터 베이스에 데이터 가져오기 //String sql="select * from message where name=?"; String sql="select * from message where no=?"; PreparedStatement pstmt=conn.prepareStatement(sql);//위의 sql문을 처리하기 위해 객체 생성 //pstmt.setString(1, name); pstmt.setInt(1, no); ResultSet rs=pstmt.executeQuery(); if(rs.next()) { %> <div class="container"> <h2>수정 하기</h2> <form action="update_proc.jsp" method="post"> <div class="form-group"> <label for="no">번호:</label> <input value=<%=rs.getInt("no")%> disabled type="text" class="form-control" id="no" name="no"> <!-- disabled 때문에 값이 제대로 안 넘어감 그래서 아래에서 타입을 hidden으로 한다.--> <input value=<%=rs.getInt("no")%> type="hidden" id="no" name="no" > </div> <div class="form-group"> <label for="name">이름:</label> <input value=<%=rs.getNString("name")%> class="form-control" id="name" name="name"> </div> <div class="form-group"> <label for="content">메모:</label> <input value=<%=rs.getNString("content")%> type="text" class="form-control" id="content" name="content"> </div> <button type="submit" class="btn btn-default">수정</button> </form> </div> <%}else{%> <script> alert("검색한 결과가 없습니다."); //window.location.href = 'http://localhost:9090/message/printSearch.jsp'; window.location.href = 'http://localhost:9090/message/updateSearch.jsp'; </script> <% //response.sendRedirect("print_search.jsp"); } pstmt.close(); conn.close(); }catch(Exception e){} finally{} %> </body> </html>그리고, deleteSearch_view에도 수정이 필요하다.
위의 updateSearch_view와 같은 부분을 수정하면 된다.
deleteSearch_view.jsp
더보기<%@ page language="java" contentType="text/html; charset=UTF-8" pageEncoding="UTF-8"%> <!-- 아래의 내용을 임포트 하자 --> <%@ page import="java.io.*" %> <%@ page import="java.sql.*" %> <!DOCTYPE html> <html> <head> <meta name="viewport" content="width=device-width, initial-scale=1"> <link rel="stylesheet" href="https://maxcdn.bootstrapcdn.com/bootstrap/3.4.1/css/bootstrap.min.css"> <script src="https://ajax.googleapis.com/ajax/libs/jquery/3.5.1/jquery.min.js"></script> <script src="https://maxcdn.bootstrapcdn.com/bootstrap/3.4.1/js/bootstrap.min.js"></script> <meta charset="UTF-8"> <title>Message Delete</title> </head> <body> <% try{ int no = Integer.parseInt(request.getParameter("no")); //String name=request.getParameter("name"); //System.out.println(name); Class.forName("oracle.jdbc.driver.OracleDriver"); Connection conn=DriverManager.getConnection( "jdbc:oracle:thin:@localhost:1521:xe","hr","1234"); if(conn==null) {System.out.println("DB접속에 실패");} System.out.println("DB접속 성공"); //sql문을 작성해서 conn객체를 이용하여 데이터 베이스에 데이터 가져오기 //String sql="select * from message where name=?"; String sql="select * from message where no=?"; PreparedStatement pstmt=conn.prepareStatement(sql);//위의 sql문을 처리하기 위해 객체 생성 //pstmt.setString(1, name); pstmt.setInt(1, no); ResultSet rs=pstmt.executeQuery(); if(rs.next()) { %> <div class="container"> <h2>삭제 하기</h2> <!-- 삭제에서는 번호만 넘겨주면 된다. 번호를 통해서만 삭제한다. --> <form action="delete_proc.jsp" method="post"> <div class="form-group"> <label for="no">번호:</label> <input value=<%=rs.getInt("no")%> disabled type="text" class="form-control" id="no" name="no"> <!-- disabled 때문에 값이 제대로 안 넘어감--> <input value=<%=rs.getInt("no")%> type="hidden" id="no" name="no" > </div> <button type="submit" class="btn btn-default">삭제</button> </form> <div class="form-group"> <label for="name">이름:</label> <input value=<%=rs.getNString("name")%> disabled class="form-control" id="name" name="name"> </div> <div class="form-group"> <label for="content">메모:</label> <input value=<%=rs.getNString("content")%> disabled type="text" class="form-control" id="content" name="content"> </div> </div> <%}else{%> <script> alert("검색한 결과가 없습니다."); //window.location.href = 'http://localhost:9090/message/printSearch.jsp'; window.location.href = 'http://localhost:9090/message/deleteSearch.jsp'; </script> <% //response.sendRedirect("print_search.jsp"); } pstmt.close(); conn.close(); }catch(Exception e){} finally{} %> </body> </html>list.jsp
더보기<%@ page language="java" contentType="text/html; charset=UTF-8" pageEncoding="UTF-8"%> <%@ page import="java.io.*" %> <%@ page import="java.sql.*" %> <!DOCTYPE html> <html> <head> <meta charset="UTF-8"> <meta name="viewport" content="width=device-width, initial-scale=1"> <link rel="stylesheet" href="https://maxcdn.bootstrapcdn.com/bootstrap/3.4.1/css/bootstrap.min.css"> <script src="https://ajax.googleapis.com/ajax/libs/jquery/3.5.1/jquery.min.js"></script> <script src="https://maxcdn.bootstrapcdn.com/bootstrap/3.4.1/js/bootstrap.min.js"></script> <link rel="stylesheet" href="https://cdnjs.cloudflare.com/ajax/libs/font-awesome/4.7.0/css/font-awesome.min.css"> <title>Page Message List</title> </head> <body> <div class="container"> <h2><button class="btn" onclick="location.href='index.jsp'"><i class="fa fa-home"></i></button>메시지 전체 리스트</h2> <form action="search_list.jsp" method=post> <div class="form-group"> <select name=where> <option value=name>이름</option> <option value=content>메시지</option> </select> <!-- <input type="text" name="name" placeholder="찾을 내용을 입력하세요"> --> <input type="text" name="search" placeholder="찾을 내용을 입력하세요"> <button type="submit" class="btn btn-default">검색</button> </div> </form> <table class="table"> <tr class="success"> <th>번호</th><th>이름</th><th>메시지</th> </tr> <% try{ Class.forName("oracle.jdbc.driver.OracleDriver"); Connection conn=DriverManager.getConnection( "jdbc:oracle:thin:@localhost:1521:xe","hr","1234"); if(conn==null) {System.out.println("DB접속에 실패");} System.out.println("DB접속 성공"); //1.요청한 페이지번호 int requestPage=1; // 만약 요청한 페이지가 1이고 글의 갯수가 0개 String _requestPage=request.getParameter("requestPage"); //System.out.printf("requestPage:%s\n", _requestPage); // 요청한 페이지가 있다면, 요청한 페이지 수를 저장하고 null이면 처음 접속한 경우이므로 1로(첫 번째 페이지) 저장한다. if(_requestPage!=null) {requestPage=Integer.parseInt(_requestPage);} System.out.printf("requestPage:%d\n", requestPage); // 2. 전체 페이지의 수를 구해야 한다. 그 이유는 요청한 페이지의 시작 글 번호와 끝 글 번호를 나오기 때문이다. // DB에 접속해서 검색을 해야하기 때문에 try ~catch문을 위로 올린 이유이다. String sql="select * from message"; PreparedStatement pstmt=conn.prepareStatement(sql);//위의 sql문을 처리하기 위해 객체 생성 ResultSet rs=pstmt.executeQuery(); // 전체 글의 갯수 ****** int totalCount=0; while(rs.next()) totalCount++; // 페이지당 글의 갯수 ******** int countPerPage=10; // 나중에 request를 이용해서 보여지는 글의 개수를 조정가능 // 전체페이지 수를 구해야 // 요청한 페이지의 시작 글번호와 끝 글번호가 나오기 때문 // 요청한 페이지에 대한 게시글의 시작 번호와 끝 번호를 계산 // 글의 처음과 끝 번호 int firstRow=(requestPage-1)*countPerPage+1; if(firstRow<1){firstRow=0;} int endRow=firstRow+countPerPage-1; if(endRow>totalCount){ endRow=totalCount; } //전체페이지수****** int totalPageCount=0; if(totalCount%10==0){ totalPageCount=(totalCount/countPerPage); }else{ totalPageCount=(totalCount/countPerPage)+1; } //시작페이지 구하기 int startPage=1; if(startPage<1){startPage=1;} //끝페이지 구하기 //int endPage=startPage+4; int endPage=1; if((startPage+4)>totalPageCount){ endPage=totalPageCount; }else{ endPage=startPage+4; } if(endPage>totalPageCount){endPage=totalPageCount;} // sql문을 작성해서 conn객체를 이용하여 데이터 베이스에 데이터 가져오기 // 게시글의 시작 번호와 끝 번호 사이의 게시글만 //sql="select * from message where no>=firstRow and no<=endRow"; //sql="select * from message where no>=? and no<=? order by no asc"; //desc(최근글), asc(이전글) sql="select * from message where no>=? and no<=? order by no asc"; //desc(최근글), asc(이전글) pstmt=conn.prepareStatement(sql); // 위의 sql문을 처리하기 위해 객체 생성 pstmt.setInt(1, firstRow); // asc pstmt.setInt(2, endRow); // asc rs=pstmt.executeQuery(); while(rs.next()) { %> <tr > <td><%=rs.getInt("no")%></td> <td><a href='printSearch_proc.jsp?name=<%=rs.getString("name")%>'><%=rs.getString("name")%></a></td> <td><%=rs.getString("content")%></td> </tr> <%} //while end %> <tr> <td colspan=2 align=center> <ul class="pagination"> <% if(requestPage!=1){ %> <li class="page-item"><a class="page-link" href="list.jsp?requestPage=<%=requestPage-1%>">이전페이지</a></li> <%}%> <% for(int i=startPage;i<=endPage;i++){ %> <li class="page-item"><a class="page-link" href="list.jsp?requestPage=<%=i%>"><%=i%></a></li> <% } %> <% if(totalPageCount!=requestPage){ %> <li class="page-item"><a class="page-link" href="list.jsp?requestPage=<%=requestPage+1%>">다음페이지</a></li> <%} %> </ul> </td> <td> <button onclick="location.href='messageForm.jsp'">글쓰기</button> </td> </tr> </table> <% pstmt.close(); conn.close(); }catch(Exception e){} finally{} %> </div> </body> </html>그리고 추가적으로 위의 정렬 방식을 desc로 변경하자.
즉, 게시물을 최신순으로 보여주는 것이 좀 더 일반적이다.
list.jsp
더보기<%@ page language="java" contentType="text/html; charset=UTF-8" pageEncoding="UTF-8"%> <%@ page import="java.io.*" %> <%@ page import="java.sql.*" %> <!DOCTYPE html> <html> <head> <meta charset="UTF-8"> <meta name="viewport" content="width=device-width, initial-scale=1"> <link rel="stylesheet" href="https://maxcdn.bootstrapcdn.com/bootstrap/3.4.1/css/bootstrap.min.css"> <script src="https://ajax.googleapis.com/ajax/libs/jquery/3.5.1/jquery.min.js"></script> <script src="https://maxcdn.bootstrapcdn.com/bootstrap/3.4.1/js/bootstrap.min.js"></script> <link rel="stylesheet" href="https://cdnjs.cloudflare.com/ajax/libs/font-awesome/4.7.0/css/font-awesome.min.css"> <title>Page Message List</title> </head> <body> <div class="container"> <h2><button class="btn" onclick="location.href='index.jsp'"><i class="fa fa-home"></i></button>메시지 전체 리스트</h2> <form action="search_list.jsp" method=post> <div class="form-group"> <select name=where> <option value=name>이름</option> <option value=content>메시지</option> </select> <!-- <input type="text" name="name" placeholder="찾을 내용을 입력하세요"> --> <input type="text" name="search" placeholder="찾을 내용을 입력하세요"> <button type="submit" class="btn btn-default">검색</button> </div> </form> <table class="table"> <tr class="success"> <th>번호</th><th>이름</th><th>메시지</th> </tr> <% try{ Class.forName("oracle.jdbc.driver.OracleDriver"); Connection conn=DriverManager.getConnection( "jdbc:oracle:thin:@localhost:1521:xe","hr","1234"); if(conn==null) {System.out.println("DB접속에 실패");} System.out.println("DB접속 성공"); //1.요청한 페이지번호 int requestPage=1; // 만약 요청한 페이지가 1이고 글의 갯수가 0개 String _requestPage=request.getParameter("requestPage"); //System.out.printf("requestPage:%s\n", _requestPage); if(_requestPage!=null) {requestPage=Integer.parseInt(_requestPage);} System.out.printf("requestPage:%d\n", requestPage); //2.전체페이지 수를 구해야함. String sql="select * from message"; PreparedStatement pstmt=conn.prepareStatement(sql);//위의 sql문을 처리하기 위해 객체 생성 ResultSet rs=pstmt.executeQuery(); //전체 글의 갯수 ****** int totalCount=0; while(rs.next()) totalCount++; //페이지당 글의 갯수 ******** int countPerPage=10; //전체페이지 수를 구해야 //요청한 페이지의 시작 글번호와 끝 글번호가 나오기 때문 int firstRow=(requestPage-1)*countPerPage+1; if(firstRow<1){firstRow=0;} int endRow=firstRow+countPerPage-1; if(endRow>totalCount){ endRow=totalCount; } //전체페이지수****** int totalPageCount=0; if(totalCount%10==0){ totalPageCount=(totalCount/countPerPage); }else{ totalPageCount=(totalCount/countPerPage)+1; } //시작페이지 구하기 int startPage=1; if(startPage<1){startPage=1;} //끝페이지 구하기 //int endPage=startPage+4; int endPage=1; if((startPage+4)>totalPageCount){ endPage=totalPageCount; }else{ endPage=startPage+4; } if(endPage>totalPageCount){endPage=totalPageCount;} //sql문을 작성해서 conn객체를 이용하여 데이터 베이스에 데이터 가져오기 //sql="select * from message where no>=firstRow and no<=endRow"; //sql="select * from message where no>=? and no<=? order by no asc"; //desc(최근글), asc(이전글) sql="select * from message where no>=? and no<=? order by no desc"; //desc(최근글), asc(이전글) pstmt=conn.prepareStatement(sql);//위의 sql문을 처리하기 위해 객체 생성 //pstmt.setInt(1, firstRow); //asc //pstmt.setInt(2, endRow); //asc pstmt.setInt(1, totalCount-endRow); //desc pstmt.setInt(2, totalCount-firstRow ); //desc rs=pstmt.executeQuery(); while(rs.next()) { %> <tr > <td><%=rs.getInt("no")%></td> <td><a href='printSearch_proc.jsp?name=<%=rs.getString("name")%>'><%=rs.getString("name")%></a></td> <td><%=rs.getString("content")%></td> </tr> <%} //while end %> <tr> <td colspan=2 align=center> <ul class="pagination"> <% if(requestPage!=1){ %> <li class="page-item"><a class="page-link" href="list.jsp?requestPage=<%=requestPage-1%>">이전페이지</a></li> <%}%> <% for(int i=startPage;i<=endPage;i++){ %> <li class="page-item"><a class="page-link" href="list.jsp?requestPage=<%=i%>"><%=i%></a></li> <% } %> <% if(totalPageCount!=requestPage){ %> <li class="page-item"><a class="page-link" href="list.jsp?requestPage=<%=requestPage+1%>">다음페이지</a></li> <%} %> </ul> </td> <td> <button onclick="location.href='messageForm.jsp'">글쓰기</button> </td> </tr> </table> <% pstmt.close(); conn.close(); }catch(Exception e){} finally{} %> </div> </body> </html>delete_proc, deleteSearch_view, list, messageForm, 등등에는 반복되는 내용이 있다.
그 내용은 DB 접속에 대한 부분이다.
복사 붙여넣기 하는 것도 귀찮다. 그래서 이 DB에 대한 접속을 한 번만 하고
그 이외에는 연결된 DB에 접근할 수 있도록 해보자.
즉, Connection 객체를 각 jsp파일에서 받아 오도록 하자.
이를 클래스로 만드는데, 클래스 명을 connection pool 이라 하자.
이 클래스가 DB에 접속하는 것에 대해 대신해 줄 것이다.
그리고 이 클래스는 Singlton 클래스로 만들 것이다. 그 이유는 말 그대로 우리가 접속하려는 DB는 HR이다.
이 DB에 대한 접근을 여러 개를 만들 필요가 없다. 유일성을 갖도록 하자.
클래스를 만들기 전에 해야할 작업이 있다.
서버는 하나만 존재하는데 그 위치는 우리의 프로젝트 맨 아래에 servers 라는 폴더가 있다.
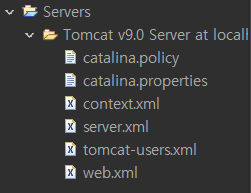
server.xml(포트 번호 설정 등. 접속에 관련된 설정 url 맵핑 등. 서버 동작에 대해),
context.xml(전체 설정 파일에 대한 내용이 있다.) 을 많이 이용한다.
두 파일의 존재를 알고 있자.
위의 Servers폴더는 처음에 서버 만들 때, new runtime하면 생성이 된다.
Servers 폴더의 context.xml파일에 들어가자.
</Context>위에 29번째 줄에 문장 입력 준비하자. connect 객체에 있는 내용과 유사하다.
1~4번째 정보는 conn객체에 있는 내용이다.

context.xml 파일 전체 내용
더보기<?xml version="1.0" encoding="UTF-8"?> <!-- Licensed to the Apache Software Foundation (ASF) under one or more contributor license agreements. See the NOTICE file distributed with this work for additional information regarding copyright ownership. The ASF licenses this file to You under the Apache License, Version 2.0 (the "License"); you may not use this file except in compliance with the License. You may obtain a copy of the License at http://www.apache.org/licenses/LICENSE-2.0 Unless required by applicable law or agreed to in writing, software distributed under the License is distributed on an "AS IS" BASIS, WITHOUT WARRANTIES OR CONDITIONS OF ANY KIND, either express or implied. See the License for the specific language governing permissions and limitations under the License. --><!-- The contents of this file will be loaded for each web application --><Context> <!-- Default set of monitored resources. If one of these changes, the --> <!-- web application will be reloaded. --> <WatchedResource>WEB-INF/web.xml</WatchedResource> <WatchedResource>WEB-INF/tomcat-web.xml</WatchedResource> <WatchedResource>${catalina.base}/conf/web.xml</WatchedResource> <!-- Uncomment this to disable session persistence across Tomcat restarts --> <!-- <Manager pathname="" /> --> <Resource auth="Container" driverClassName="oracle.jdbc.driver.OracleDriver" url="jdbc:oracle:thin:@localhost:1521:xe" username="hr" password="1234" name="jdbc/oracle" type="javax.sql.DataSource" maxActive="20" maxWait="10000" /> </Context>이제 위해서 ConnectionPool 클래스를 만들어 보자.
현재 프로젝트iot의 하위의 Java Resources의 하위 폴더인 src의 패키지인 com.iot.web에
순수 자바 파일( Class 선택 )일 만든다. 메인 함수는 필요 없다.
서블릿을 선택하지 않는다.
자바로 설정을 해야 한다.
ConnectionPool.java
더보기package com.iot.web; import java.sql.Connection; import java.sql.SQLException; import javax.naming.Context; import javax.naming.InitialContext; import javax.naming.NamingException; import javax.sql.DataSource; public class ConnectionPool { private static Connection conn = null; private ConnectionPool() {;} public static Connection getConnection() throws SQLException, NamingException { if (conn != null) {return conn;} else { Context initContext = (Context)new InitialContext().lookup("java:comp/env/"); DataSource ds = (DataSource)initContext.lookup("jdbc/oracle"); conn = ds.getConnection(); } return conn; } }그리고, 위의 내용을 list.jsp에 적용해보자. list파일에서 아래의 내용을 임포트 하자.
<!-- 임포트 추가 -->
<%@ page import="com.iot.web.ConnectionPool" %>
그리고 기존의 DB에 접속하는 내용을 주석처리를 하고, 사용해보자.
그리고 list.jsp파일을 실행해보자.
그런데 실행을 하고 DB에 있는 내용을 찾지 못하는 경우도 있다. 이런 경우에는
list.jsp파일의 내용을 우클릭해서 Debug As 에서 Debug on Server를 실행해보자.
이와 같은 문제가 발생하는 이유는 자바 파일에서 내용을 가져와서 conn을 생성 해야해서
시간적인 타이밍 문제인 듯 하다.
이에 대한 라이브러리가 있으므로. 나중에 그걸 사용할 것이다.
여기서는 접속만 확인하자.list.jsp
더보기<%@ page language="java" contentType="text/html; charset=UTF-8" pageEncoding="UTF-8"%> <%@ page import="java.io.*" %> <%@ page import="java.sql.*" %> <!-- 임포트 추가 --> <%@ page import="com.iot.web.ConnectionPool" %> <!DOCTYPE html> <html> <head> <meta charset="UTF-8"> <meta name="viewport" content="width=device-width, initial-scale=1"> <link rel="stylesheet" href="https://maxcdn.bootstrapcdn.com/bootstrap/3.4.1/css/bootstrap.min.css"> <script src="https://ajax.googleapis.com/ajax/libs/jquery/3.5.1/jquery.min.js"></script> <script src="https://maxcdn.bootstrapcdn.com/bootstrap/3.4.1/js/bootstrap.min.js"></script> <link rel="stylesheet" href="https://cdnjs.cloudflare.com/ajax/libs/font-awesome/4.7.0/css/font-awesome.min.css"> <title>Page Message List</title> </head> <body> <div class="container"> <h2><button class="btn" onclick="location.href='index.jsp'"><i class="fa fa-home"></i></button>메시지 전체 리스트</h2> <form action="search_list.jsp" method=post> <div class="form-group"> <select name=where> <option value=name>이름</option> <option value=content>메시지</option> </select> <!-- <input type="text" name="name" placeholder="찾을 내용을 입력하세요"> --> <input type="text" name="search" placeholder="찾을 내용을 입력하세요"> <button type="submit" class="btn btn-default">검색</button> </div> </form> <table class="table"> <tr class="success"> <th>번호</th><th>이름</th><th>메시지</th> </tr> <% Connection conn = null; // 선언 try{ /* Class.forName("oracle.jdbc.driver.OracleDriver"); Connection conn=DriverManager.getConnection( "jdbc:oracle:thin:@localhost:1521:xe","hr","1234"); */ conn = ConnectionPool.getConnection(); // 전달 if(conn==null) {System.out.println("DB접속에 실패");} System.out.println("DB접속 성공"); //1.요청한 페이지번호 int requestPage=1; // 만약 요청한 페이지가 1이고 글의 갯수가 0개 String _requestPage=request.getParameter("requestPage"); //System.out.printf("requestPage:%s\n", _requestPage); if(_requestPage!=null) {requestPage=Integer.parseInt(_requestPage);} System.out.printf("requestPage:%d\n", requestPage); //2.전체페이지 수를 구해야함. String sql="select * from message"; PreparedStatement pstmt=conn.prepareStatement(sql);//위의 sql문을 처리하기 위해 객체 생성 ResultSet rs=pstmt.executeQuery(); //전체 글의 갯수 ****** int totalCount=0; while(rs.next()) totalCount++; //페이지당 글의 갯수 ******** int countPerPage=10; //전체페이지 수를 구해야 //요청한 페이지의 시작 글번호와 끝 글번호가 나오기 때문 int firstRow=(requestPage-1)*countPerPage+1; if(firstRow<1){firstRow=0;} int endRow=firstRow+countPerPage-1; if(endRow>totalCount){ endRow=totalCount; } //전체페이지수****** int totalPageCount=0; if(totalCount%10==0){ totalPageCount=(totalCount/countPerPage); }else{ totalPageCount=(totalCount/countPerPage)+1; } //시작페이지 구하기 int startPage=1; if(startPage<1){startPage=1;} //끝페이지 구하기 //int endPage=startPage+4; int endPage=1; if((startPage+4)>totalPageCount){ endPage=totalPageCount; }else{ endPage=startPage+4; } if(endPage>totalPageCount){endPage=totalPageCount;} //sql문을 작성해서 conn객체를 이용하여 데이터 베이스에 데이터 가져오기 //sql="select * from message where no>=firstRow and no<=endRow"; //sql="select * from message where no>=? and no<=? order by no asc"; //desc(최근글), asc(이전글) sql="select * from message where no>=? and no<=? order by no desc"; //desc(최근글), asc(이전글) pstmt=conn.prepareStatement(sql);//위의 sql문을 처리하기 위해 객체 생성 //pstmt.setInt(1, firstRow); //asc //pstmt.setInt(2, endRow); //asc pstmt.setInt(1, totalCount-endRow); //desc pstmt.setInt(2, totalCount-firstRow ); //desc rs=pstmt.executeQuery(); while(rs.next()) { %> <tr > <td><%=rs.getInt("no")%></td> <td><a href='printSearch_proc.jsp?name=<%=rs.getString("name")%>'><%=rs.getString("name")%></a></td> <td><%=rs.getString("content")%></td> </tr> <%} //while end %> <tr> <td colspan=2 align=center> <ul class="pagination"> <% if(requestPage!=1){ %> <li class="page-item"><a class="page-link" href="list.jsp?requestPage=<%=requestPage-1%>">이전페이지</a></li> <%}%> <% for(int i=startPage;i<=endPage;i++){ %> <li class="page-item"><a class="page-link" href="list.jsp?requestPage=<%=i%>"><%=i%></a></li> <% } %> <% if(totalPageCount!=requestPage){ %> <li class="page-item"><a class="page-link" href="list.jsp?requestPage=<%=requestPage+1%>">다음페이지</a></li> <%} %> </ul> </td> <td> <button onclick="location.href='messageForm.jsp'">글쓰기</button> </td> </tr> </table> <% pstmt.close(); conn.close(); }catch(Exception e){} finally{} %> </div> </body> </html>아래의 내용에서 MVC1에 대해 알아보자.
designatedroom87.tistory.com/310
MVC(Model View Control)1
아래의 내용을 살펴보자. designatedroom87.tistory.com/303?category=901206 게시판 만들기 우선, MultiInsert.jsp 파일부터 만드는데, MultiInsert이 하는 역할은 테이블에 데이터를 충분히 많이 저장하기 위해..
designatedroom87.tistory.com
'JAVA > 웹 프로그래밍 - JSP' 카테고리의 다른 글
MVC(Model View Control)2 (0) 2020.11.13 MVC(Model View Control)1 (0) 2020.11.11 Form을 활용해서 정보를 DB와 연결하기 (2) 2020.11.07 Form을 활용해서 정보를 DB와 연결하기 (0) 2020.11.05 클라이언트에 대한 정보 찾기 (0) 2020.11.04